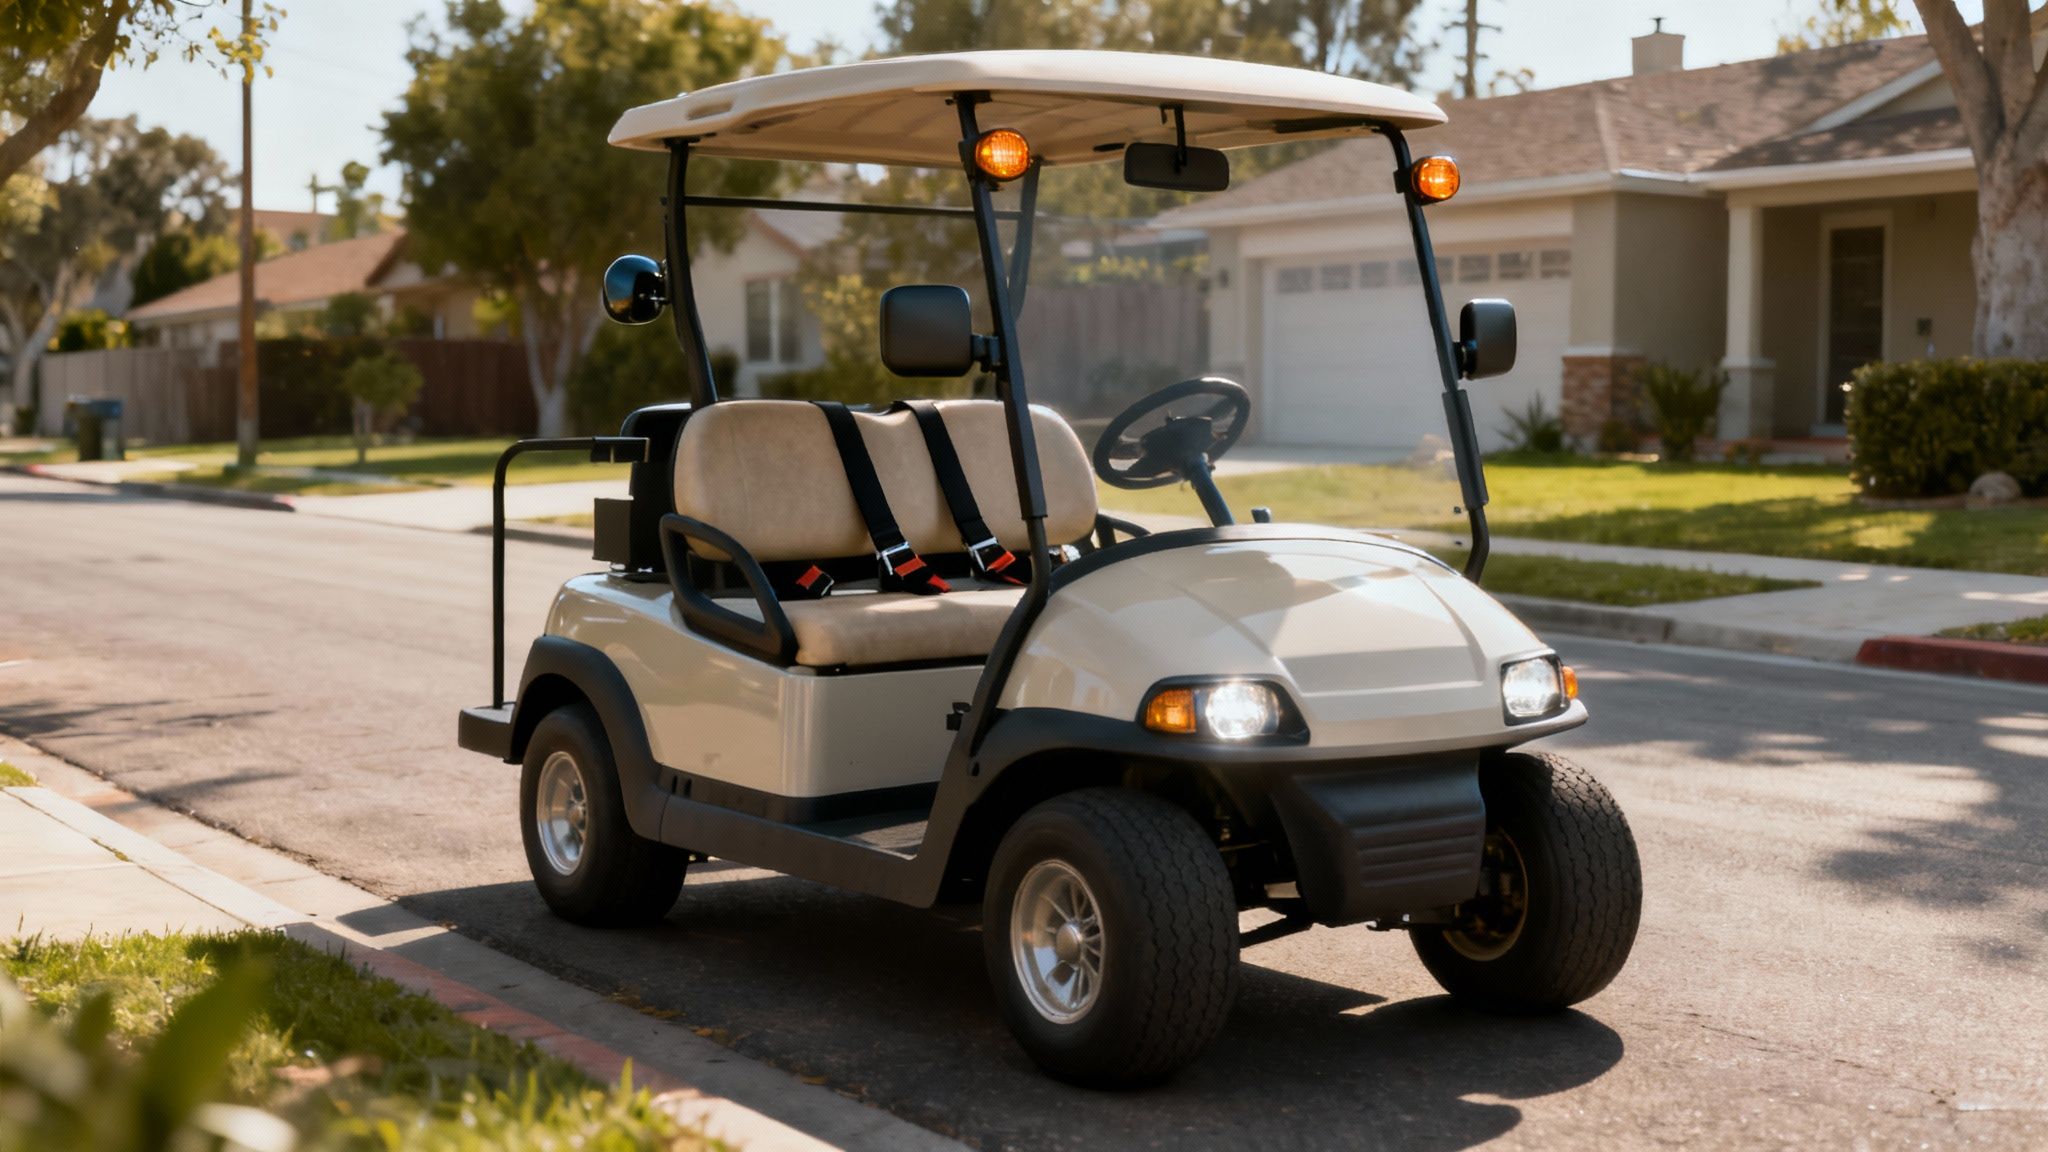
So, you're thinking about taking your golf cart from the fairway to the street. The first thing you'll need is a street legal golf cart kit. These kits bundle all the essential parts needed to upgrade a standard golf cart, turning it into what the law calls a Low-Speed Vehicle (LSV) that can be legally driven on most public roads.
Think of it as the complete package: headlights, tail lights, turn signals, mirrors, a horn, and seat belts—everything required to meet both federal and state safety rules. It's all about transforming your cart from a simple course cruiser into a legitimate, road-ready vehicle.
Decoding Street Legal Golf Cart Requirements
Before you buy a single part, it’s critical to get a handle on what "street legal" actually means. It’s not just about slapping on a few accessories. It’s a formal process of meeting specific legal standards that officially reclassify your golf cart as a Low-Speed Vehicle, or LSV.
An LSV is a specific vehicle category defined by federal law, designed for roads with lower speed limits—typically 35 mph or less. It's a distinct classification, putting it in a different league than a standard car or a recreational golf cart. While the feds set the baseline, each state adds its own layer of rules, so always check your local regulations.
This trend is a huge driver of market growth. In the United States alone, the electric golf cart market sits at around $529 million and is on track to hit nearly $887 million by 2033. This boom is happening because more communities are embracing these quiet, low-emission vehicles. Of course, that popularity also means navigating a patchwork of state-by-state laws. You can dive deeper into these market trends in this detailed industry report.
The Core Components of an LSV Conversion
To get your cart ready for the road, you'll have to install some specific equipment. A pre-packaged street legal kit makes this a whole lot easier, but it still pays to know exactly what’s required to ensure you’re fully compliant. These items are non-negotiable and form the foundation of any legal conversion.
Here's a quick look at the core parts found in most street legal kits and why each one is critical for safety and passing inspection.
Essential Components for a Street Legal Conversion
| Component | Purpose for Street Legality | Common Feature |
|---|---|---|
| Headlights & Tail Lights | Essential for visibility at night, dawn, and dusk. | Often high-efficiency LEDs for low power draw. |
| Brake Lights | Signals slowing or stopping to traffic behind you. | Integrated with the tail light housing. |
| Turn Signals | Communicates your intent to turn or change lanes. | Usually controlled by a steering column-mounted lever. |
| Reflectors | Enhances visibility from the sides and rear, especially when parked. | Red and amber reflectors are standard. |
| Horn | An audible warning device required for safety. | A simple push-button horn is typical. |
| Rear-View Mirrors | Provides awareness of traffic approaching from behind. | Kits include side mirrors and often a center mirror. |
| Seat Belts | Required for the driver and all passengers. | Retractable belts are common for front-facing seats. |
| Windshield | Protects occupants from debris. | Must be AS-1 or AS-5 rated safety glass or acrylic. |
| VIN Plate | A 17-digit Vehicle Identification Number for registration. | A unique number assigned during the inspection process. |
Ultimately, a good kit handles all these requirements in one go, saving you the headache of sourcing each part individually and ensuring they all work together.
At its heart, making a golf cart street legal is about safety and predictability. You're equipping it to behave like any other vehicle on the road, ensuring other drivers can anticipate your actions.
Beyond the Basics: Safety and Identification
Beyond the lighting and signals, there are a few other must-haves to pass inspection. A windshield is a universal requirement, and it can’t just be any piece of plastic—it needs to be shatter-resistant acrylic or laminated safety glass.
You'll also need seat belts for every single passenger, a horn that’s loud enough to be heard from a reasonable distance, and at least one rear-view mirror (though a set of side mirrors is always a better idea).
Finally, your cart has to get a unique 17-digit Vehicle Identification Number (VIN). This is a crucial step for getting it titled and registered. Understanding these rules before you start saves a ton of frustration and money down the road.
How to Choose the Right Conversion Kit
Picking the right street-legal conversion kit for your golf cart is a bigger deal than most people think. Get it right, and you're looking at a smooth installation and an easy pass at the DMV. Get it wrong, and you're in for a world of headaches—parts that don't fit, failed inspections, and money down the drain.
The first big decision is whether to grab an all-in-one kit or piece everything together yourself.
Honestly, for about 95% of owners, an all-in-one kit is the way to go. These bundles are a lifesaver. They pack everything you need—headlights, turn signals, mirrors, horn, and the all-important wiring harness—into a single box. It takes all the guesswork out of the equation and guarantees every component is designed to play nice together.
Going the à la carte route and sourcing parts individually gives you ultimate control, but it's a path for the pros. You really need to know your way around wiring diagrams and component compatibility. If you're building a truly custom cart or just replacing a single broken part, this might be for you. Should you go this route, you'll want to start with a list of reputable electric vehicle parts suppliers to avoid low-quality junk.
Matching a Kit to Your Cart Model
This is where people get tripped up. A kit for a Club Car Precedent is not going to bolt onto a Yamaha Drive, period. The mounting points, the contours of the body, and especially the electrical systems are all different across the major brands like Club Car, EZ-GO, and Yamaha.
Before you even think about clicking "buy," you need to nail down two things:
- Your Cart’s Exact Model and Year: This is non-negotiable. A 2007 EZ-GO TXT is a different beast from a 2019 model.
- Kit Compatibility: The product page needs to explicitly state that it's made for your specific cart. If you see vague language like "universal fit" or "fits most golf carts," run. That’s a huge red flag.
This whole process really boils down to a simple, three-part flow.
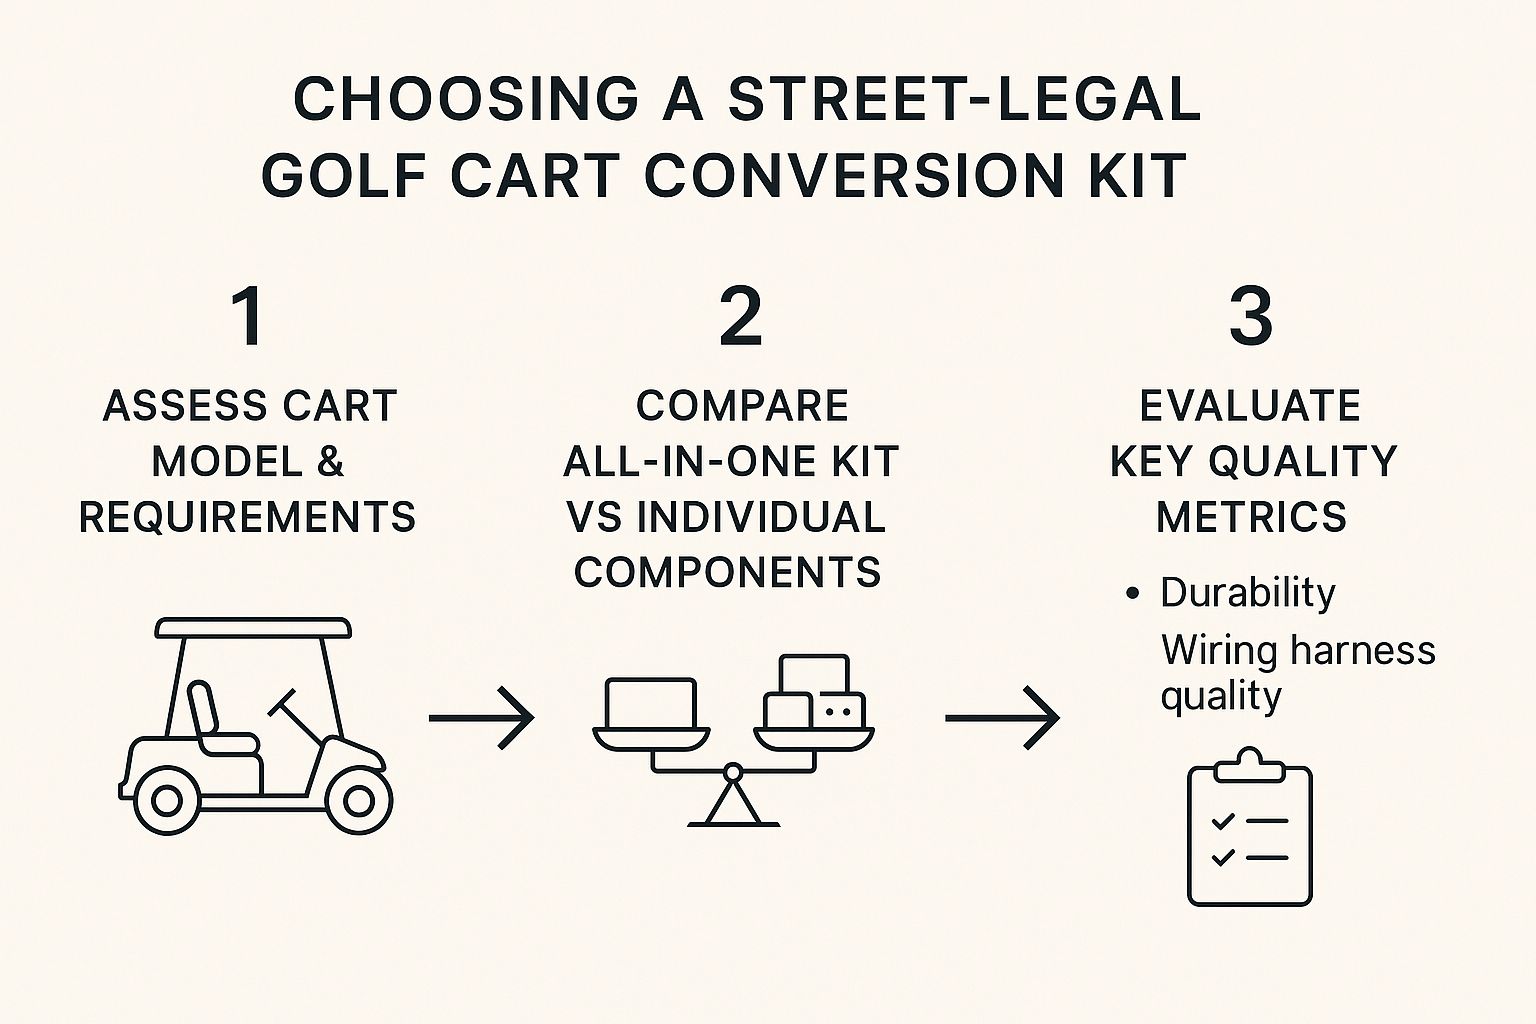
As the visual shows, once you know what your cart needs, you choose between a complete kit or individual parts. But no matter which path you take, the final step is always a thorough quality check.
Spotting Quality and Avoiding Headaches
Beyond just fitting your cart, the actual quality of the components is what separates a reliable kit from a cheap knock-off that'll have you pulling your hair out. I've seen it all: brittle plastic housings that crack on the first bump, dim lights that burn out in a month, and wiring harnesses that are a tangled, confusing mess.
My Two Cents: The wiring harness is the central nervous system of your entire electrical system. Always hunt for kits that come with a pre-wired, plug-and-play harness. It costs a little more, but it makes the installation ten times easier and dramatically cuts down the risk of shorts or other electrical gremlins.
When you're looking at a kit online, zoom in on the details. Do the light housings look like they're properly sealed against rain? Does the horn sound like it belongs on a car or a kid's bicycle? Are the installation instructions written in clear English with good diagrams? These small clues tell you everything about a manufacturer's commitment to quality. A little extra diligence here ensures your investment pays off with a cart that's truly ready for the road.
Your Practical Installation Walkthrough
Alright, you've got the kit. Now for the fun part. Installing a street-legal kit can seem daunting, but it's really just a series of smaller, manageable projects. We're going to break it down logically: first, we'll prep the workspace and the cart itself. Then, we’ll tackle the electrical system, and finally, we'll mount all the new hardware.
The goal here is a clean, safe installation. So before you even think about grabbing a wrench, let's get the foundation right.
Preparation and Safety First
Every good project starts with a solid setup. Get your golf cart parked on a flat, level surface and make sure the parking brake is on. For good measure, chock the wheels—you don't want any surprises.
Now for the most important step: disconnect the battery. This isn't optional; it's the one thing that prevents electrical shocks and keeps you from frying any components. If you've got lead-acid batteries, always disconnect the negative (black) terminal first, then the positive (red). This order prevents the wrench from creating a spark if it accidentally touches the frame.
Pro Tip: Snap a quick photo of your battery connections with your phone before you disconnect anything. It’s a simple trick that eliminates any guesswork when it's time to hook everything back up.
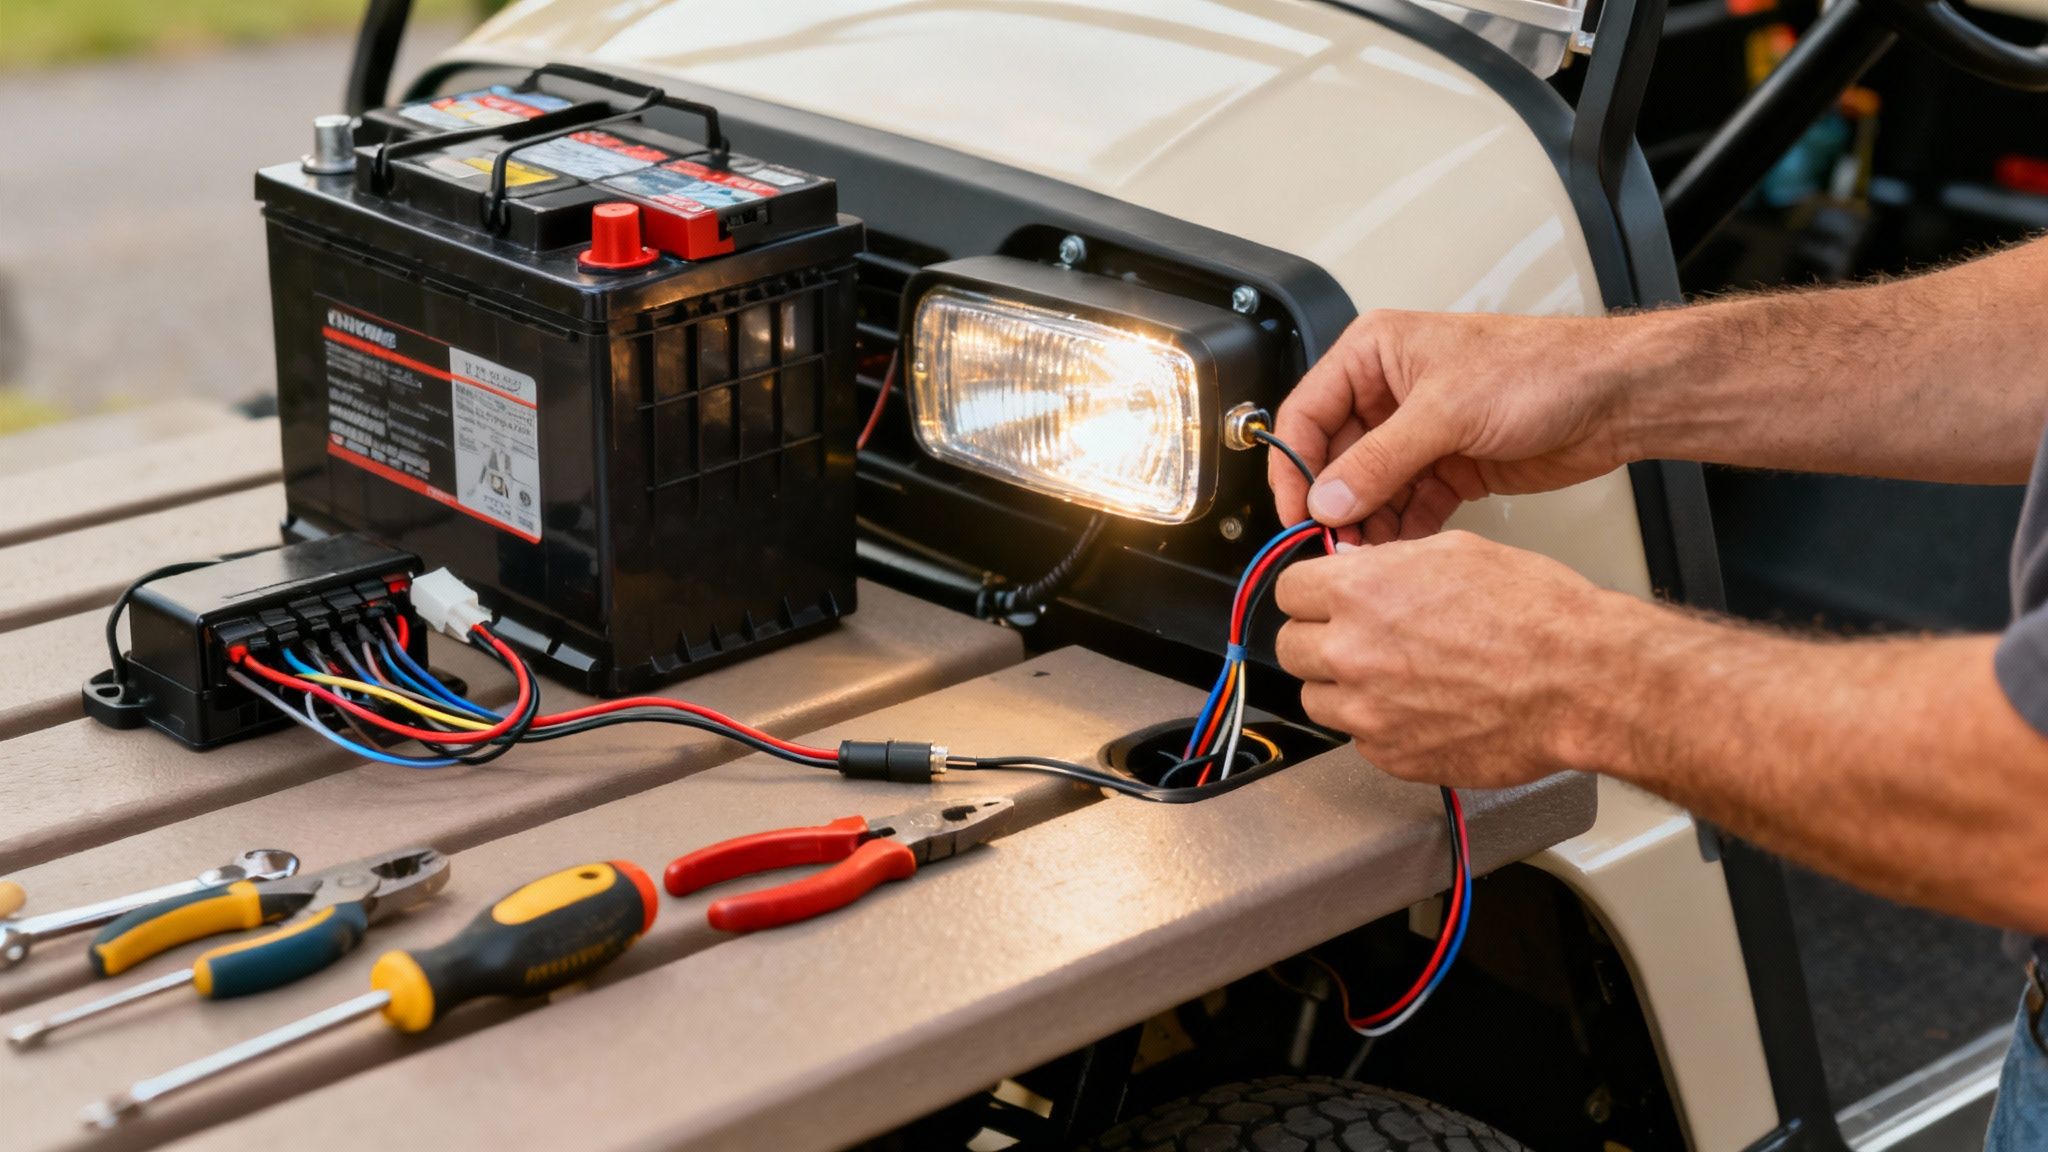
Installing the Core Electrical System
The wiring harness is the nervous system of your street-legal kit. It’s what connects all the new parts—lights, horn, turn signals—to the cart's power. Thankfully, most quality kits today come with a plug-and-play harness, which makes this job a whole lot easier than it used to be.
I like to start by laying the entire harness out on the ground next to the cart. This gives you a mental map of where everything is supposed to go. You'll see labeled connectors for headlights, tail lights, and the controls that go on the steering column. Follow the manufacturer's diagram and route the main loom through the cart's frame, using zip ties to secure it away from any hot or moving parts. A tidy wiring job isn't just for looks; it prevents future problems.
This push toward more sophisticated features is a big reason why the global golf cart market is projected to grow from $2.85 billion in 2025 to over $4.17 billion by 2032. These aren't just for the golf course anymore; they're becoming legitimate neighborhood vehicles.
Mounting Lights, Windshield, and Mirrors
With the wiring roughly in place, it's time to mount the hardware. This part of the process is less about electrical know-how and more about good old-fashioned measuring and careful cutting.
- Headlights and Tail Lights: Your kit probably came with templates to show you where to cut. The old carpenter’s rule applies: measure twice, cut once. For the clean, factory-looking holes in fiberglass or plastic, a Dremel or a jigsaw with a fine-tooth blade is your best friend.
- Windshield: This almost always mounts to the front roof supports. It's much easier with a second person to hold it steady while you secure the brackets. Go easy on the bolts—over-tightening is a surefire way to crack the acrylic.
- Mirrors: Side mirrors usually bolt right onto the roof supports. For the center rearview mirror, sit in the driver's seat and find the best line of sight before you drill any holes into the windshield frame or roof.
Applying some general product assembly strategies can make any installation, not just this one, go a lot smoother.
Securing the Seat Belts
Last but certainly not least are the seat belts. This is a critical safety component, so take your time and do it right. Where you mount them depends entirely on your cart's make and model.
Some carts will have pre-drilled mounting points ready to go, which is a huge time-saver. If not, you'll have to drill into the frame. Always use the heavy-duty bolts and backing plates that came with your kit. These ensure the anchor points are solid and can handle the force of an impact. If you need a more detailed guide, we have an article that covers proper golf cart seat belt installation.
Once every component is bolted on and wired up, it’s time to reconnect the battery. Do it in the reverse order of how you disconnected it: positive (red) terminal first, then the negative (black). Now, turn the key and test everything. Go through the list: headlights (high and low beams), tail lights, brake lights, all four turn signals, and the horn. Confirming everything works now will save you a major headache later.
Navigating the DMV and Titling Process
You’ve done all the hard work installing the kit, and your golf cart finally looks the part. Now comes the paperwork. This is where you officially turn your golf cart into a road-ready Low-Speed Vehicle (LSV), and a little preparation makes the trip to the DMV a whole lot smoother.
This isn’t just about getting a license plate. It’s about completely reclassifying your vehicle in the eyes of the law. You'll need to submit the right forms, pass an official inspection, and pay a few fees. Think of it as the final exam that certifies your cart is officially ready for the street.
Gathering Your Essential Documents
Trust me on this one: walking into the DMV unprepared is a surefire way to waste an entire afternoon. Before you even think about heading out, get a folder and gather every single piece of paper you'll need. State requirements can vary a bit, but for an LSV conversion, the core documents are pretty much the same everywhere.
Here’s what you absolutely must have ready to go:
- Manufacturer’s Certificate of Origin (MCO): This is the single most important document. It came with your street legal golf cart kit and proves all the new parts meet federal safety standards.
- Proof of Insurance: You need a real auto insurance policy that lists your cart as an LSV. Your homeowner's policy won't cut it here.
- Title and Registration Application: This is just the standard form for titling any vehicle in your state. Be sure to fill it out completely before you get to the counter.
- Bill of Sale: Have the original bill of sale for the golf cart to prove you're the rightful owner.
- Weight Slip: Some states want an official weight certificate from a certified scale to document the cart’s final curb weight.
The MCO is your golden ticket. It's the official document that tells the state your conversion parts are legitimate and meet the necessary safety criteria for on-road use. Without it, your application will almost certainly be denied.
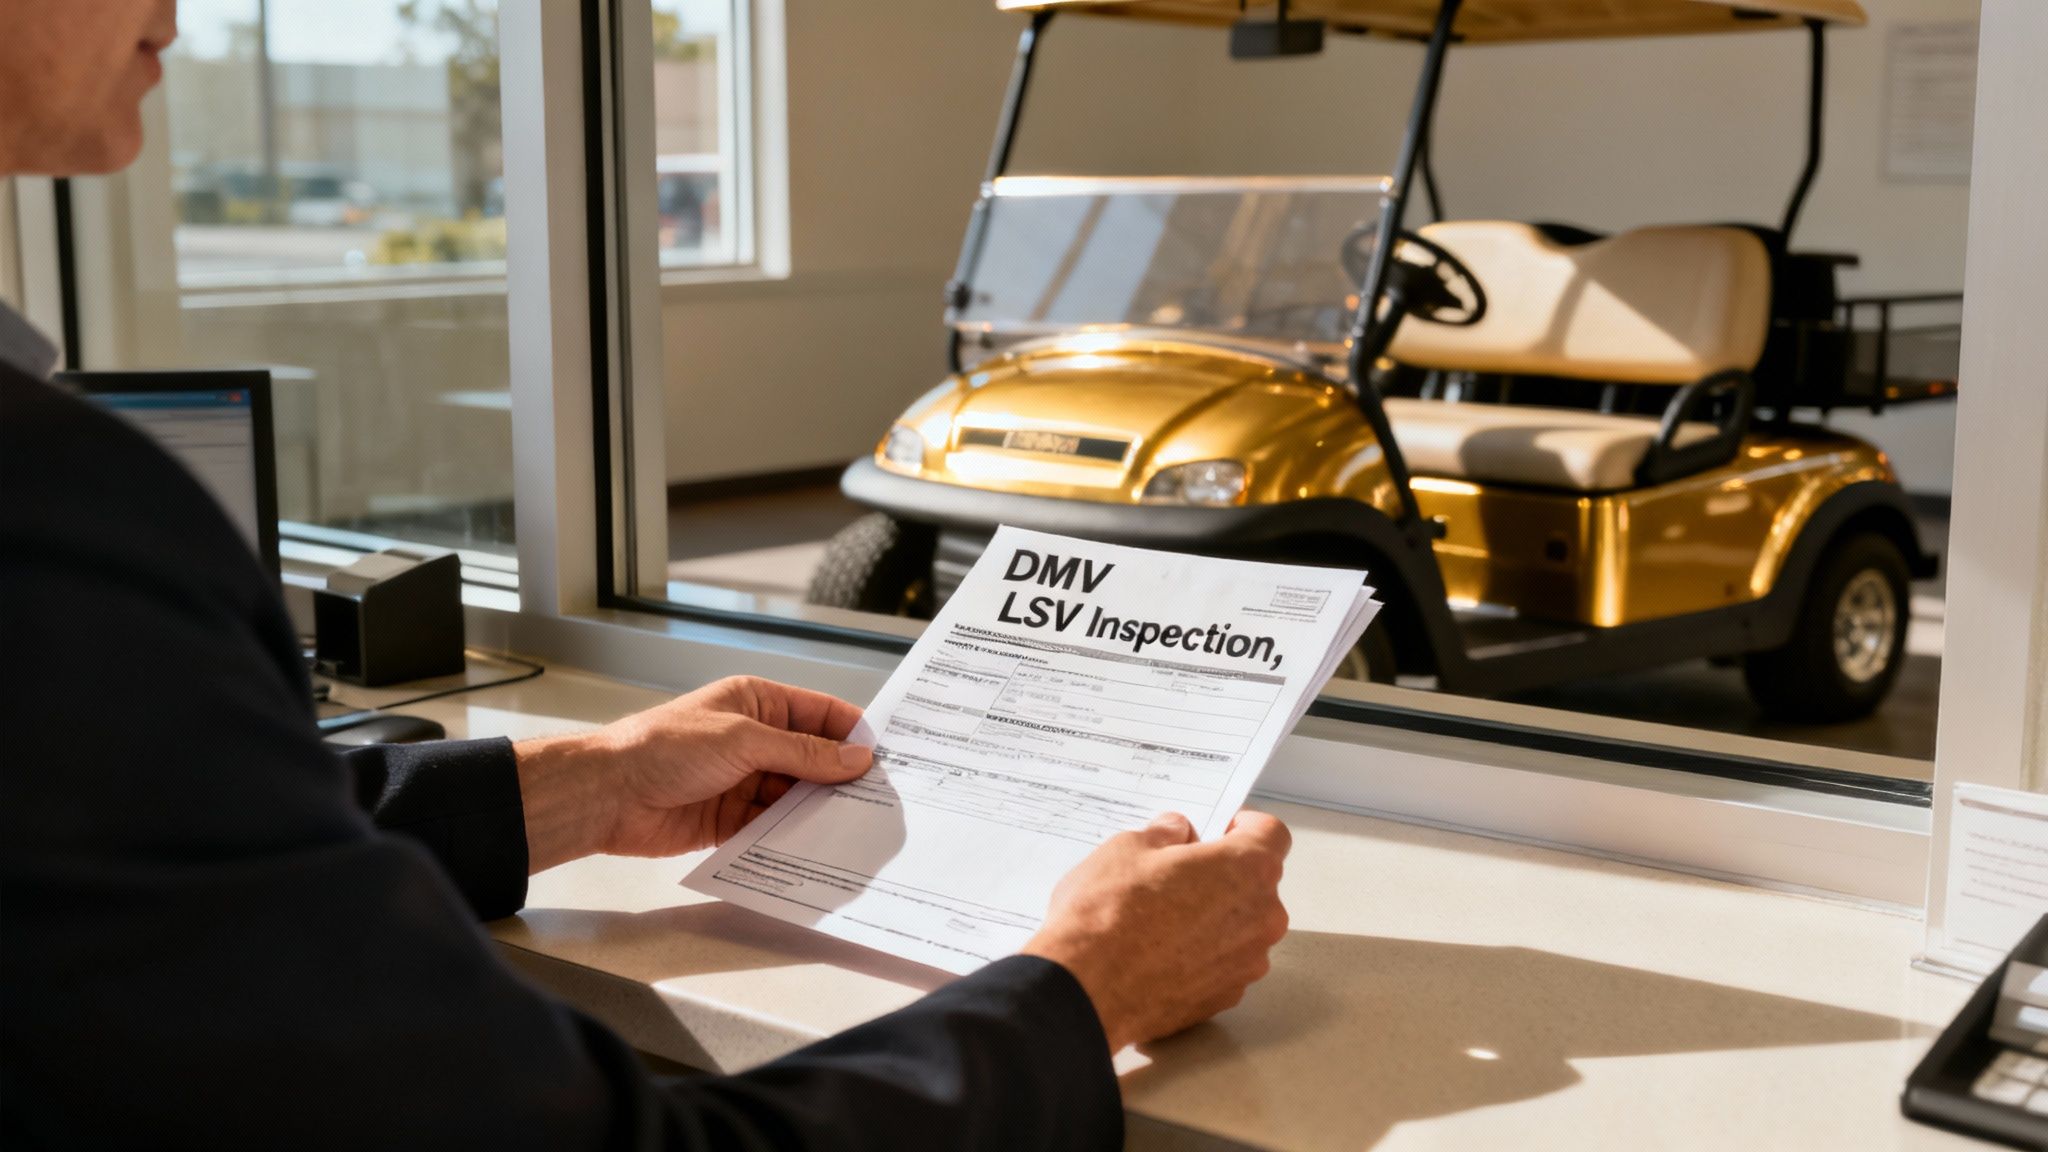
Passing the Official LSV Inspection
With your paperwork in order, it's time for the inspection. An official state agent will go over your cart with a fine-tooth comb to make sure every required piece of equipment is installed and works perfectly. They're going to check the headlights, brake lights, turn signals, horn, mirrors, windshield, and seat belts.
The inspector will also need to find and verify the new 17-digit Vehicle Identification Number (VIN) assigned to your cart. This is where your careful installation work really gets put to the test. You're proving that your vehicle is no longer a simple golf cart but a fully compliant LSV.
For a more detailed look at what to expect, check out our guide on golf cart registration. If you show up with organized documents and a properly equipped cart, you'll sail through these final steps like a pro.
Solving Common Problems and Frustrations
Let's be realistic—no project goes perfectly from start to finish, and turning your golf cart into a road-ready machine is no different. Even when you've got the best street legal golf cart kit on the market, you can still run into a few frustrating snags. Think of this section as your troubleshooting roadmap, built from the hard-won experience of countless others who've been in your shoes.
We're here to make sure a small hiccup doesn't turn into a project-ending headache. We’ve seen it all, from baffling electrical gremlins to parts that just refuse to line up. The key is knowing how to solve these common issues quickly so you can get back to the fun part.
One of the first things that trips people up is the turn signals. You install your shiny new LED lights, and suddenly your signals are blinking at a frantic, crazy pace. This is called hyper-flashing, and it happens because your new LEDs draw so little power that the original flasher relay thinks a bulb has burned out. Thankfully, the fix is a simple one: just swap out that old flasher for a new one designed specifically for LEDs.
Navigating Fitment and Inspection Issues
Another common source of frustration is when a part from the kit just doesn't seem to fit right. It's tempting to start modifying things right away, but hold off for a moment. First, triple-check that you have the right kit for your cart's exact make, model, and year. It sounds obvious, but it’s a surprisingly frequent mix-up. If you've confirmed it's the correct kit, a little gentle persuasion or a minor trim to a plastic mounting bracket might be all you need.
So, what if you do everything right but still fail the DMV inspection? Don't sweat it. This is more common than you'd think. The inspector isn't trying to fail you; they'll give you a clear, specific list of exactly what needs fixing.
- Weak Horn: The horn in your kit might not meet the decibel level your state requires. An easy upgrade to a slightly more robust automotive horn usually solves this.
- Wrong Windshield: Inspectors are trained to look for the AS-1 or AS-5 stamp on your windshield. If yours doesn't have it, it won't pass.
- Loose Connections: A flickering light or a dead horn might just be a wire that wiggled loose. Go back and double-check every single electrical connection before you head back for round two.
The secret to passing a re-inspection is to methodically address every single item on the inspector's list. Fix exactly what they pointed out, don't argue, and your next visit will almost certainly be a success.
Your project is part of a massive movement toward convenient, local transportation. The global market for these vehicles is on track to reach $2.45 billion by 2025, a huge jump fueled by their growing popularity in planned communities, resorts, and large campuses. You can dig into the numbers in this comprehensive report. With a little patience and the right troubleshooting approach, your cart will be ready to hit the road and join them.
A Few More Questions We Hear All the Time
Even with a clear roadmap, a few questions always seem to pop up right before someone decides to take the plunge and make their golf cart street legal. Let's tackle some of the most common ones we get asked, so you can move forward with total confidence.
What’s the Real Cost of a Street Legal Kit?
This is a bit like asking "how much does a bag of groceries cost?" – it really depends on what you put in the cart.
You can find bare-bones kits with just the essential lights and mirrors for around $200. On the other hand, a premium, all-in-one package with a high-end windshield, a digital speedometer, and a simple plug-and-play wiring harness could set you back $700 or more.
A few things will influence that final price tag:
- The brand and overall quality of the parts.
- Exactly which components are included.
- The specific model of your golf cart, as some need unique parts.
Don't forget to factor in the other costs, too. Things like DMV registration fees and the new insurance policy are all part of the total investment to get your cart ready for the road.
A Quick Word of Advice: It can be tempting to just buy the cheapest kit available. But from my experience, spending a little more on a quality, model-specific kit almost always pays off. It saves you a ton of headaches during the installation and makes passing the final inspection much smoother.
Can Any Golf Cart Be Made Street Legal?
Pretty much, but not always. If you have a modern cart from one of the big names like Club Car, EZ-GO, or Yamaha, you're in great shape. These are built with conversions in mind, and their frames and electrical systems can easily handle the upgrades.
Where you might hit a snag is with really old, vintage carts or some obscure, off-brand models. Their frames might not be built to safely anchor seat belts, or their wiring could be a complete mess, making the electrical work a real nightmare. The single most important thing you can do is confirm that any kit you buy is specifically made for your cart's exact year and model before you spend a dime.
Is Special Insurance Required?
Yes, and this is non-negotiable. The moment your golf cart is officially registered as a Low-Speed Vehicle (LSV), your homeowner's policy won't cover it on public roads anymore.
You'll need to get a separate auto insurance policy that meets your state's minimum liability coverage, just as you would for your car. It pays to shop around a bit—some carriers offer specialized LSV policies that are often more affordable. This isn't just about following the law; it's about protecting yourself financially.
Ready to transform your cart into the ultimate neighborhood vehicle? At Solana EV, we provide premium, stylish, and durable electric vehicles that are ready for the road. Explore our lineup of street-legal carts today.