Upgrading your golf cart with a proper seat belt installation is one of the smartest moves you can make. It's about turning a fun vehicle into a genuinely safer ride for your family and anyone else hopping on board. The whole process really boils down to mounting a universal seat belt kit, brackets and all, straight to the cart's frame to create a solid anchor point.
Why Bother Installing Seat Belts on Your Golf Cart?
Let's be real—most golf carts are built for the fairway, not for cruising through your neighborhood. They’re designed for convenience at low speeds, not for the kind of robust safety we expect from a daily vehicle. As more and more people use carts for local transport, that safety gap becomes a real problem. This is exactly why adding seat belts isn't just a minor tweak; it's a fundamental safety upgrade.
The way we use golf carts has completely changed. They’ve broken free from the golf course and are now the go-to for all sorts of things:
- Getting around sprawling residential communities.
- Making a quick trip to the local store.
- Taking the kids or grandkids down to the community pool.
- Managing large properties, sometimes with tricky, uneven ground.
From Fairway Fun to Family Transport
Think about the everyday situations. A sudden stop when a dog runs out into the street, a sharp turn at an intersection, or even just hitting a nasty pothole you didn't see. Any of these can easily toss a passenger—especially a child—right out of their seat.
Without a seat belt, even a slow-speed mishap can lead to a serious fall or ejection from the cart. This is all about making a practical, responsible change that matches how you actually use your cart, not just how it was originally designed. The peace of mind you get from this simple modification is priceless.
The rise of golf carts on public roads has even caught the eye of safety regulators. Historically, they didn't come with seat belts because they were meant for slow speeds on flat ground. But as their role has expanded, so have the risks. The National Highway Traffic Safety Administration has even looked into the safety standards for these low-speed vehicles.
Here's the bottom line: The way we use golf carts has evolved to be more like a car for short trips, but the built-in safety features haven't. Installing seat belts is the single most effective thing you can do to close that gap.
It's Often More Than a Good Idea—It's the Law
In a growing number of places, putting seat belts on your golf cart is no longer optional. It's a legal requirement, especially when you have kids on board. For example, some states now have laws that require seat belts for any passenger under a certain age if the cart is on a public road.
Ignoring these rules can lead to fines, but more importantly, it could leave you liable if an accident happens. Investing in a proper seat belt installation is a small price to pay for such significant protection. You can get a better handle on the general rules in our guide on golf cart safety training.
Choosing the Right Seat Belt Kit for Your Cart
Before you can even think about installation, you've got to pick the right seat belt kit. This isn't just a minor detail—it's the most critical part of the whole process. The market is flooded with options, and what works for a basic course cart won't be the best fit for a souped-up neighborhood cruiser.
Your first big decision is going to be between retractable and non-retractable belts.
Retractable belts are just like the ones in your car. They spool out when you pull them and snap back neatly when unbuckled. This is a huge plus for convenience, especially if you have kids or different passengers hopping in and out all the time. No more belts dragging on the ground or getting tangled.
On the other hand, you have non-retractable belts. These are simple, sturdy lap belts that you have to manually tighten each time. They might seem a bit old-school, but their simplicity is their strength. With fewer moving parts, there's less to break down, making them a really durable and budget-friendly option for workhorse carts.
This image gives you a good look at the different components you'll find in various kits. Pay attention to the buckles and webbing—you can often spot quality (or a lack thereof) right away.
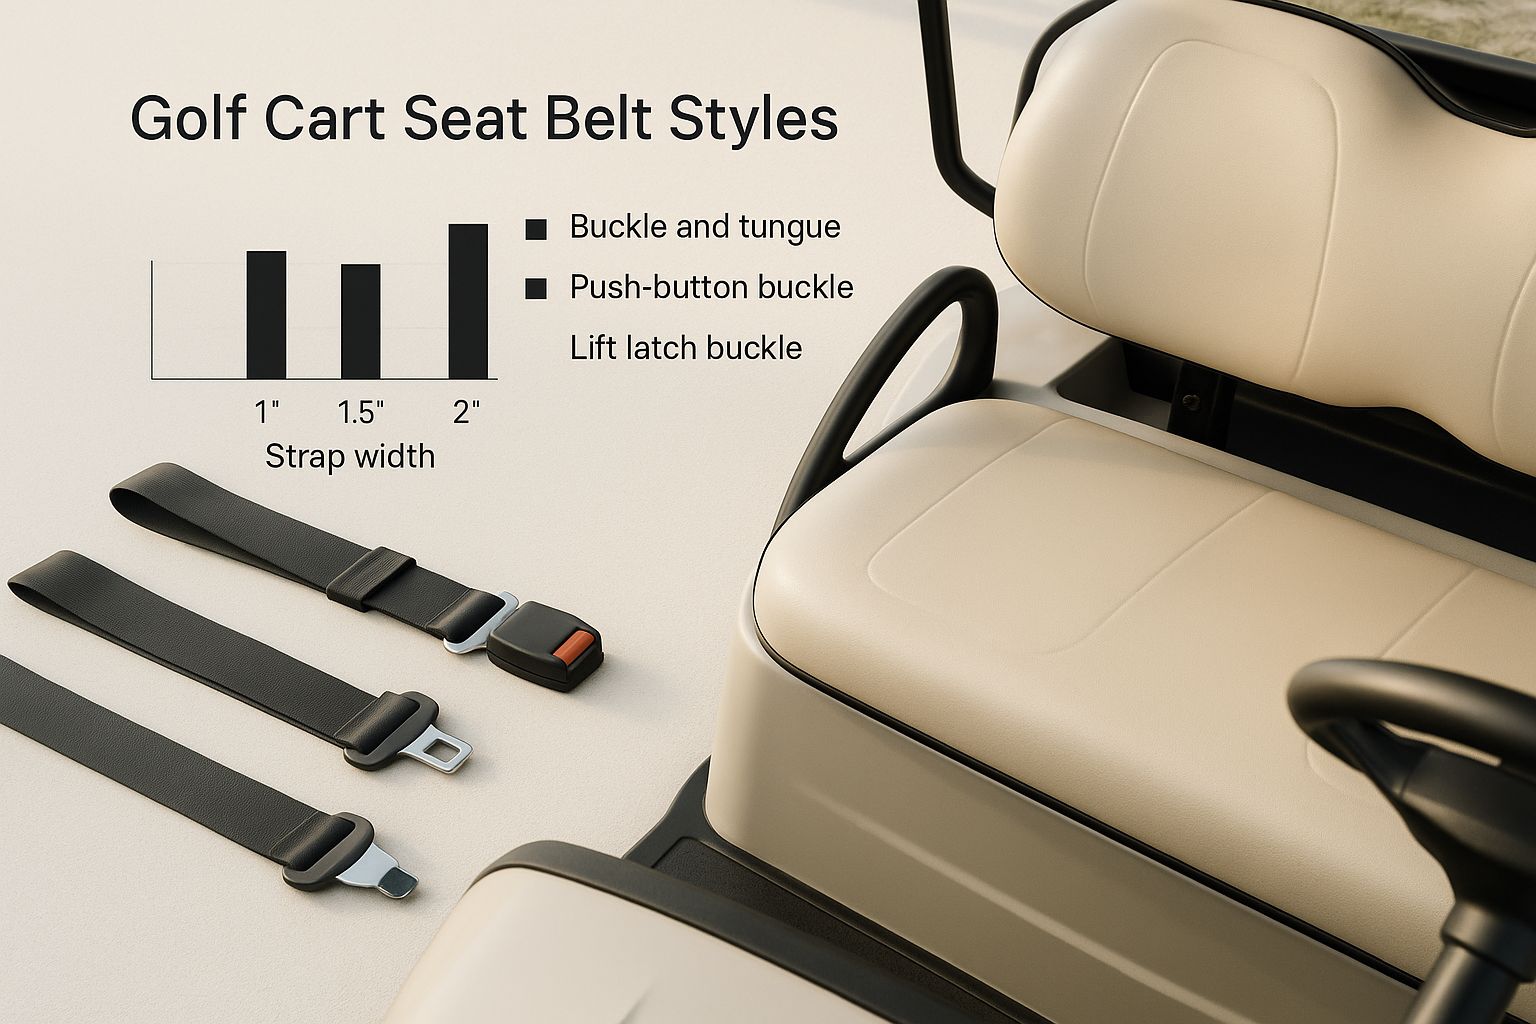
You can see how a robust buckle and thicker webbing on one belt clearly suggest better durability compared to a flimsier alternative.
Universal Kits vs. Vehicle-Specific Brackets
Most of the kits you’ll find online are universal. This means they're designed with brackets and hardware intended to fit a whole range of golf cart makes and models. For most people, a good universal kit does the job just fine.
But if you own a popular model from a big name like EZGO, Club Car, or Yamaha, you can often find vehicle-specific brackets. These are a game-changer. They’re engineered to bolt directly into the factory-drilled holes in your cart’s frame, which means no measuring, no guesswork, and no drilling. If you want the absolute easiest installation, this is the way to go.
Key Takeaway: No matter which kit you choose, the mounting bracket is everything. A weak, thin bracket completely undermines the safety of the belts. Always look for heavy-gauge steel that feels solid and won't flex under pressure.
Comparison of Golf Cart Seat Belt Kits
To help you sort through the options, I’ve put together a quick comparison of the most common kits you'll come across. This should make it easier to pinpoint which one makes the most sense for your cart and how you use it.
| Kit Type | Best For | Installation Difficulty | Pros | Cons |
|---|---|---|---|---|
| Universal Retractable | Carts used for frequent passenger transport and neighborhood cruising. | Moderate | Clean look, convenient, always ready for use. | More expensive, installation requires careful placement. |
| Universal Non-Retractable | Budget-conscious owners or carts used in rugged, dirty environments. | Easy | Affordable, durable with fewer moving parts. | Requires manual adjustment, can be cumbersome. |
| Vehicle-Specific | Owners of EZGO, Club Car, or Yamaha carts who want the easiest installation. | Easy | Perfect fit, no drilling required, very secure. | Higher cost, limited to specific cart models. |
Ultimately, choosing a kit comes down to balancing convenience, cost, and installation effort. A great place to start your search and compare prices is with some of the top golf cart accessories retailers. Just remember, the goal is to get a kit that anchors securely to your cart’s frame and is built to last.
Getting Your Tools Ready for the Job
Before you even think about turning a single wrench, let's talk about prep work. Trust me on this one—spending 10 minutes getting your tools and cart ready now can save you an hour of frustration later. It’s the difference between a smooth, professional installation and a trip back to the hardware store with a half-finished project.
We're not just bolting on a simple accessory here. In most cases, you'll be drilling directly into your cart's frame to create a secure anchor point. Doing it right means having the right stuff on hand from the very beginning.
The Must-Have Tool Checklist
You don't need a professional mechanic's entire toolbox, but a few key items are non-negotiable. Scrambling to find a drill bit mid-install is no fun, so get these laid out and ready to go.
- Socket Set and Wrench: Forget the adjustable wrench for this. You need a proper socket set to get the right torque on the bolts without stripping the heads. It’s a game-changer for getting everything tight and secure.
- Power Drill & Good Bits: A sharp set of drill bits is your best friend here. You'll likely need a few sizes, but 1/4-inch and 3/8-inch bits are common for most seat belt kits. Don't try to get by with dull bits; you'll just make a mess of the frame.
- Tape Measure & Marker: "Measure twice, drill once" isn't just a saying; it's the law of the land for this project. Precision is everything for getting the belts positioned symmetrically and safely.
- Safety Glasses: This one’s not optional. When you're drilling into a metal frame, small, sharp metal shavings will fly. Protect your eyes.
Pro Tip: Always aim to mount your brackets to the solid metal frame, not the plastic body or fiberglass. The right tools are what allow you to access these strong, secure points and ensure the belts will actually hold in an impact.
Prepping Your Cart for Surgery
Once your tools are gathered, it's time to get the cart itself ready. A little bit of prep makes the whole process cleaner and safer.
First things first: disconnect the battery. It's a simple step that completely removes the risk of any accidental shorts while you're working, especially if you're drilling near any wiring under the seat.
Next, give your work area a good cleaning. Pop off the seat cushions and wipe down the frame and floor where you'll be installing the brackets. A clean surface makes it much easier to see your measurement marks and keeps grime out of the new hardware.
Finally, get everything out of the cart—golf bags, coolers, you name it. You need a clear, open space to move around and get the job done right. A little upfront effort here really does set the stage for a perfect installation.
Getting Your Golf Cart Seat Belts Installed
Alright, you've got your tools laid out and the cart is ready to go. Now comes the most important part: the actual golf cart seat belt installation. The whole point of this project isn't just to slap some straps on the seat; it's to build a restraint system that’s solidly anchored to the cart's frame. This is where safety really comes into play.
The core idea is simple but non-negotiable: your mounting points have to be strong enough to handle serious force. That means you're going to bypass the flimsy plastic body panels and go straight for the steel chassis underneath. It's the same logic as finding a stud in your wall before hanging a heavy mirror—you need to anchor into something that won't give way.
H3: Finding the Right Spot for the Mounting Brackets
First things first, you need to figure out exactly where the mounting brackets are going to live. If you're using a universal kit, you probably have a main bar that runs behind the seat to anchor everything. The best spot for this is almost always directly behind the seat cushion, positioned right over the cart's frame rails.
Go ahead and lay the bracket in that general area. Grab your tape measure and make sure it's perfectly centered. A bracket that's even slightly off-center will not only look sloppy but could also cause the belts to pull unevenly in an emergency. Once you've got it perfectly placed, use a marker to mark your drill spots.
Here’s a pro tip I learned the hard way: Before you drill, pop the seat cushion back on for a second. This quick dry-fit confirms the bracket won't get in the way of the seat, saving you from a major headache later on.
Tackling projects like this can feel a lot less intimidating when you've done your homework. Checking out guides on other do-it-yourself projects can give you a good foundation and the right "measure twice, cut once" mindset.
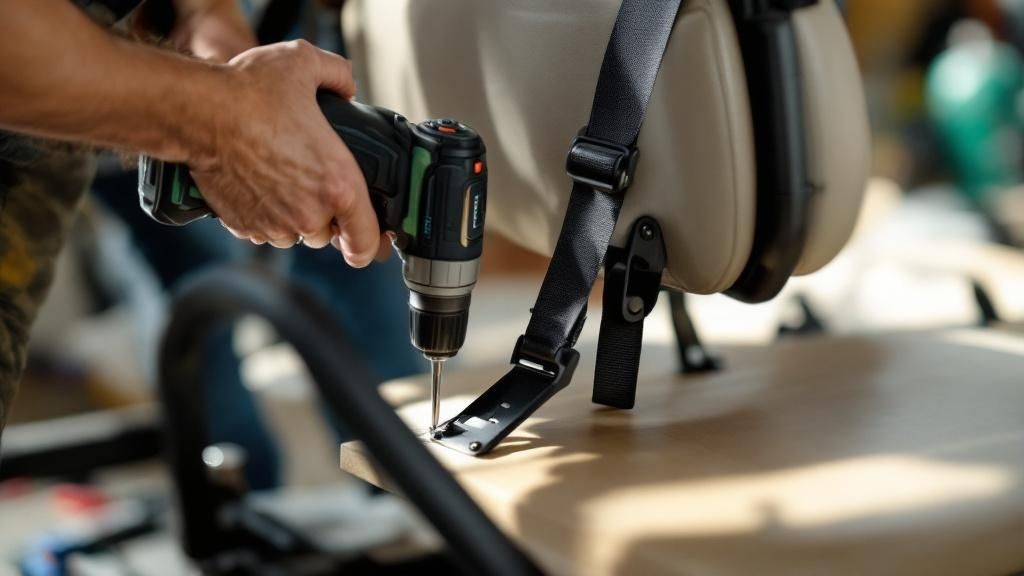
H3: Drilling and Locking Down the Main Bracket
Now for the fun part—drilling into your cart's frame. To keep your drill bit from "walking," start with a small pilot hole. After that, you can switch to the final bit size your bolts require and drill right through your marks. Take your time here; a steady hand and a sharp bit make all the difference for a clean hole.
With your holes prepped, you can secure the main bracket. Position it over the holes and feed the bolts through. This is where your socket set comes in handy.
- Don't Forget Washers: You need a washer on both ends—under the bolt head and against the nut. This simple step is crucial because it spreads the pressure out, preventing the hardware from ripping through the frame under strain.
- Tighten in a Pattern: Resist the urge to just crank down on one bolt all the way. Snug them all up first, then go back and tighten each one a little at a time, alternating between them. This ensures the bracket sits perfectly flush and secure.
This solid base is what the entire safety system relies on.
H3: Attaching the Belts and Buckles
Once that main bracket is rock-solid, it's time to attach the seat belt components. The retractors—the mechanisms that wind up the belt—and the buckle ends will usually bolt right onto this bar.
Pay close attention to orientation. The retractor units are designed to lock up properly only when they are mounted perfectly vertically. If you install one at an angle, it might not engage when you need it most. Make sure they're straight up and down before you tighten them down.
Next, attach the buckle on the other side, placing it where it's easy for a passenger to reach. Before you call it a day, give each belt a few sharp tugs to make sure the retractors lock up like they're supposed to. You should have a clean, sturdy setup that feels every bit as reliable as the belts in your car.
Common Installation Mistakes to Avoid
Even a project that seems as straightforward as installing golf cart seat belts has its classic pitfalls. I've seen a few of these missteps firsthand, and learning from them is the quickest way to get the job done right the first time, ensuring your hard work actually translates into a safe, reliable setup.
Mounting to Plastic, Not Steel
One of the most common—and dangerous—mistakes is mounting the brackets to the wrong material. It’s so tempting to just drill into the plastic or fiberglass body under the seat. It's easy, it's right there, but it's a critical safety failure. Those materials are just for looks; they will absolutely shatter or rip out under the force of a sudden stop, making the seat belts completely useless.
Let me be clear on the number one rule of this installation: Always anchor your hardware directly to the solid steel frame of the cart. The frame is the only part of your cart built to handle the immense force of an impact and keep everyone secure.
Overlooking the Small Hardware Details
Another classic blunder is overlooking the small but mighty hardware that comes with your kit. I'm talking specifically about the washers. It's easy to forget them or put them on the wrong side of the bolt, but they play a crucial role.
Without a washer, all the pressure from a tightened bolt head and nut is focused on a tiny area. In an emergency, that concentrated force can literally pull the bolt straight through the metal frame. Washers are designed to distribute that load across a much wider surface, which dramatically strengthens your mounting points.
A few other common slip-ups I see:
- Sloppy Hole Placement: Drilling holes that are slightly off-center doesn't just look sloppy; it can create an uneven pull on the belts during a sudden jolt.
- Forgetting the "Yank Test": Once the belts are in, some people just call it a day. The final, critical step is to give each belt a sharp, hard tug to make sure the retractor mechanism locks up instantly.
- Ignoring Local Laws: Many cart owners add belts without ever checking local rules. If you're planning on making your cart street-legal, for example, there are often specific requirements you have to meet. We cover this in our guide to golf cart registration.
Rushing the Measurement and Drilling Process
When you're holding a drill, accuracy is everything. Rushing this part of the job almost always leads to misaligned holes or, worse, drilling into a structurally weak spot. Always measure twice, mark your spots clearly with a marker, and double-check that your chosen location won't interfere with any wiring or moving parts underneath.
This isn't just about avoiding a headache; it's about respecting the real-world physics of a potential accident. The lack of seat belts in golf carts is already a known risk. We know from decades of data on standard cars that seat belts reduce fatalities by 45% for front-seat passengers and cut serious injuries by 50%. You can read more about vehicle safety on trafficsafetyteam.org.
By taking your time and doing a proper installation, you’re bringing that same proven safety technology to your cart. Steering clear of these simple mistakes ensures your new belts will be there to do their job when it matters most.
Your Golf Cart Seat Belt Installation Questions Answered
Even with a step-by-step guide, there are always a few lingering questions that pop up. I get it. You want to make sure you've covered all your bases. Let's tackle some of the most common things people ask, so you can finish this project feeling completely confident.
One of the biggest uncertainties revolves around legal requirements. Honestly, the rules are all over the map—they can change from state to state, and sometimes even by county or city. The general rule of thumb is this: if your cart never leaves your private property, you've got a lot more leeway. But the second you drive it on a public road, you’re playing by a different set of rules.
This is especially true for carts classified as Low-Speed Vehicles (LSVs). To be street-legal, an LSV absolutely must have seat belts, along with other safety gear like turn signals and headlights. The bottom line is that safety regulations are only getting stricter, both from a legal standpoint and because people simply expect safer rides these days.
Specific Installation Concerns
I often get asked if you can install seat belts on both the front and rear-facing seats. The answer is a resounding yes. The process doesn't really change. No matter which way the seat is facing, the core of the installation is anchoring a solid mounting bracket directly to the cart's main frame.
Here are a few other quick-fire questions that come up all the time:
- Can I use a child car seat? Absolutely, but only after you've installed a proper seat belt system. The car seat needs to be secured tightly according to its own instructions, and a standard lap belt is usually enough to do the job right.
- How long does this actually take? If it's your first time but you have the right tools laid out, plan for about 1 to 2 hours.
- Do retractable belts need any special care? Not really. Just keep the belt webbing clean and give it a quick, sharp tug every now and then to make sure the retractor still locks up instantly.
No matter what kind of cart you have—a simple two-seater or a big multi-passenger shuttle—the goal is always the same: create a rock-solid connection between the seat belt and the vehicle's structural frame.
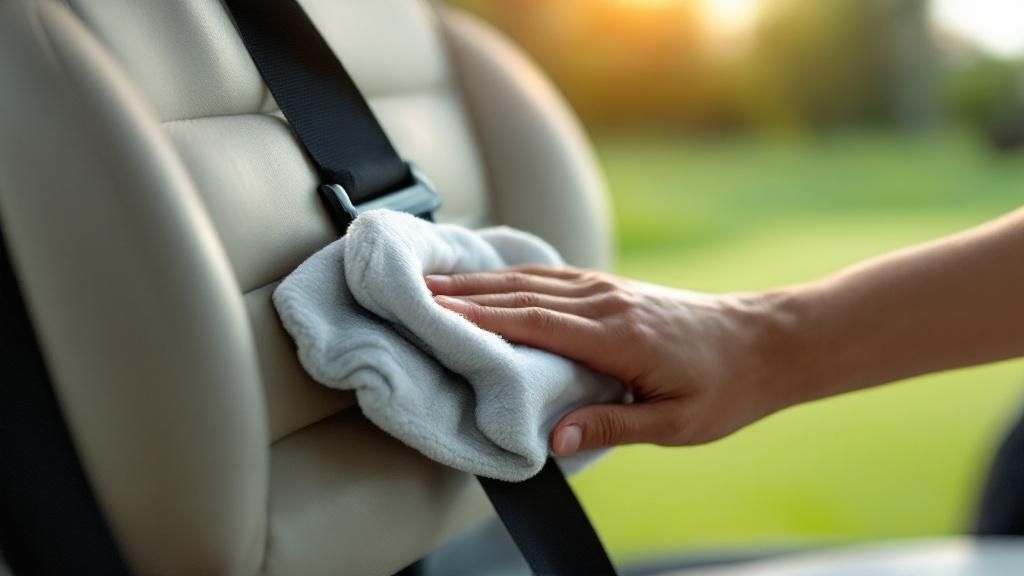
Keeping Your New Belts in Top Shape
Once your new belts are in, they're pretty low-maintenance. Just make it a habit to glance over the webbing every so often, looking for any fraying or sun damage that could weaken the material. It's also a good idea to check that the mounting bolts are still tight, as the vibrations from just driving around can sometimes work them loose over time.
This upgrade is a game-changer for safety, especially if you're thinking about making your cart street-legal. To learn more about that process, you should read our guide on road-legal electric carts. A proper safety setup is the first and most important step.