
Charging your golf cart isn't just about plugging it in and walking away. To do it right—and to protect your investment—you need to know exactly what kind of power system you're working with. Using the wrong charger or charging method is a fast track to damaging your batteries, so let's get the basics down first.
Getting to Know Your Golf Cart's Power System
Before you even think about plugging anything in, you need to pop the seat and take a look. Your cart's battery pack is its heart, and its voltage and chemistry dictate the entire charging process. Getting this wrong is a costly mistake.
I learned this the hard way years ago. A friend borrowed a charger, thinking "a charger is a charger." He hooked up a 36V charger to his brand-new 48V cart. The result? A fried charger and a set of batteries that never held a full charge again. That’s why figuring out your voltage is the absolute first step.
What's Your Cart's Voltage?
Thankfully, figuring out your cart’s voltage is pretty straightforward. You just need to do a little detective work on one of the batteries.
Lift the seat and look for the plastic caps where you’d add distilled water. Count how many of these caps are on a single battery.
- 3 Caps = 6-volt battery
- 4 Caps = 8-volt battery
- 6 Caps = 12-volt battery
Now, count how many batteries are linked together and do the math. If you see six batteries with 8-volt caps, you've got a 48V system (6 batteries x 8 volts = 48 volts). That number is what you need to match your charger to. No exceptions.
Lead-Acid vs. Lithium: A Tale of Two Technologies
Next up is figuring out what your batteries are made of. The golf cart world is dominated by two main types: the old-school lead-acid and the modern lithium-ion. They couldn't be more different in how they need to be charged and maintained.
It's a common myth that all golf cart batteries are basically the same. Treating a maintenance-free lithium battery like a traditional lead-acid one (like trying to add water) can cause serious, expensive system failures.
Traditional lead-acid batteries are the heavy-duty workhorses you’ve probably seen for years. They need regular check-ups, especially topping off the water levels. Lithium-ion, however, is the newer, lighter, and more efficient technology that's taking over.
In fact, electric golf carts are now the biggest part of the market, and much of that growth comes from the advantages of lithium. For a closer look, our guide on the benefits of a lithium battery golf cart breaks down why so many owners are making the switch.
To get a better handle on what you might have, here's a quick comparison.
Battery Type Quick Comparison Guide
This table gives you a side-by-side look at the most common battery types, helping you identify yours and understand its specific needs.
| Feature | Lead-Acid Batteries | AGM Batteries | Lithium-Ion Batteries |
|---|---|---|---|
| Maintenance | Regular water checks required | Maintenance-free (sealed) | Completely maintenance-free |
| Weight | Very heavy | Heavy, but lighter than lead-acid | Very lightweight (50-75% lighter) |
| Lifespan | 3-5 years | 4-6 years | 10+ years |
| Charging Time | 8-12 hours | 6-10 hours | 2-4 hours |
| Upfront Cost | Low | Moderate | High |
Whether you have the tried-and-true lead-acid or a newer lithium setup, knowing the difference is key to proper care.
If you're interested in the engineering behind it all, you can find some fascinating insights into electric vehicle power systems that apply to more than just carts. Understanding how power, torque, and efficiency work together gives you a real appreciation for the technology humming away under your seat.
Once you’ve nailed down your voltage and battery type, you’re ready to build a charging routine that will keep your cart running reliably for years to come.
How to Choose the Right Golf Cart Charger
Picking a charger for your golf cart isn't just about finding a plug that fits. Think of it this way: the right charger is the guardian of your batteries, while the wrong one can drastically shorten their lifespan or even become a safety hazard. This is a critical investment that protects the most expensive part of your electric cart.
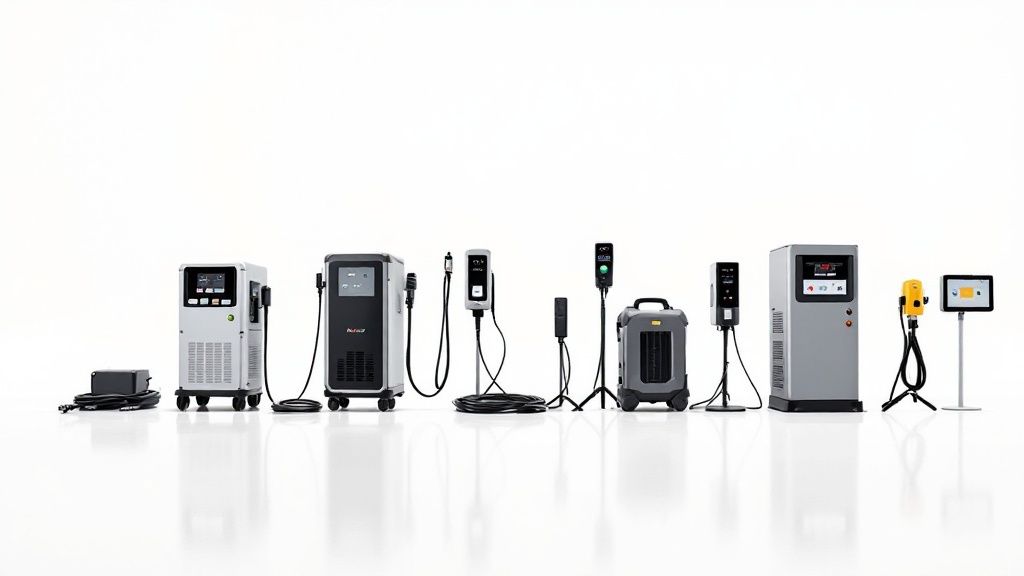
First things first, and this is non-negotiable: match the voltage. A 48V battery pack needs a 48V charger. End of story. If you try to use a 36V charger on a 48V cart, you'll constantly undercharge the batteries, leading to sulfation and premature death. Go the other way—a higher voltage charger on a lower voltage system—and you're risking catastrophic damage.
Find Your Charger's Key Specifications
To get this right, you need to pay attention to two numbers on any charger you're considering: voltage (V) and amperage (A).
- Voltage (V): As we just covered, this has to match your cart’s total battery pack voltage. Common setups are 36V, 48V, or even 72V.
- Amperage (A): This is all about charging speed. A higher amp rating means a faster charge. For instance, a 25A charger will get you back on the road much quicker than a standard 15A model.
Let's put that in real-world terms. A typical 48V lead-acid battery pack holds about 225 amp-hours (Ah). If you run it down to 50%, you need to put 112.5 Ah back in. A 15-amp charger will take a little over seven hours to do that, while a 25-amp charger could get it done in under five.
This choice really comes down to your daily routine. If you just use your cart for short trips around the neighborhood and can plug it in overnight, a basic 15-18 amp charger will do the job perfectly. But if you’re managing a fleet and need a quick turnaround between users, investing in a higher-amperage charger makes a lot of sense.
Smart Chargers vs. Manual Chargers
The technology inside the box matters just as much as the power it puts out. The biggest divide here is between modern automatic chargers and the older manual style.
An automatic or "smart" charger is pretty much the standard these days, and for good reason. These chargers actually talk to your battery pack. They bring it to a full charge and then automatically switch over to a "float" or maintenance mode. This mode just trickles a tiny bit of power to the batteries, keeping them topped off without overcharging—a classic battery killer. You can plug it in and walk away.
A manual charger, on the other hand, is a dumb device. It just keeps pushing power into the batteries until you unplug it. Forget about it, and you'll boil the electrolyte right out of your lead-acid batteries, causing permanent damage. Unless you're dealing with a very old cart or have a very specific need, a smart charger is always the way to go.
The peace of mind a smart charger offers is invaluable. It removes the guesswork and human error from the charging process, ensuring your batteries are always optimally charged and protected from the dangers of overcharging.
Practical Choices: On-Board vs. Portable
Finally, you'll need to decide on the charger's physical form. Do you want it bolted to the cart itself, or would you prefer a portable unit you keep in the garage?
On-Board Chargers
These are mounted right onto the golf cart. All you have to do is pull out an extension cord and plug it into the wall.
- Pros: It’s incredibly convenient since you can't leave it at home. This is perfect if you plan on charging up at a friend's place or a vacation rental.
- Cons: It adds weight to your cart and is constantly exposed to vibrations, bumps, and whatever the weather throws at it.
Portable Chargers
These are the standalone boxes you connect when it's time to charge.
- Pros: They stay safe from the elements and road shock in your garage. Plus, one charger can service multiple carts (as long as they're the same voltage).
- Cons: You have to remember to bring it with you if you're traveling, and they can be bulky and a bit of a pain to move around.
As more and more neighborhoods and businesses adopt electric carts, the market for these accessories has exploded. This growth, fueled by the demand for greener transportation, means you have more choices than ever. According to industry analysis from Verified Market Reports, this trend is only continuing. That's great news for you, as it makes it easier to find a charger that perfectly fits your lifestyle and your cart's specific needs.
A Practical Guide to the Charging Process
Alright, you've picked out the right charger. Now for the main event: actually charging the cart. It might seem straightforward, but how you do it matters. A consistent, safe routine is what separates a battery pack that lasts for years from one that gives up the ghost prematurely.
Let's walk through the right way to do it, from start to finish.
This infographic breaks down the simple but critical steps for a safe hookup.
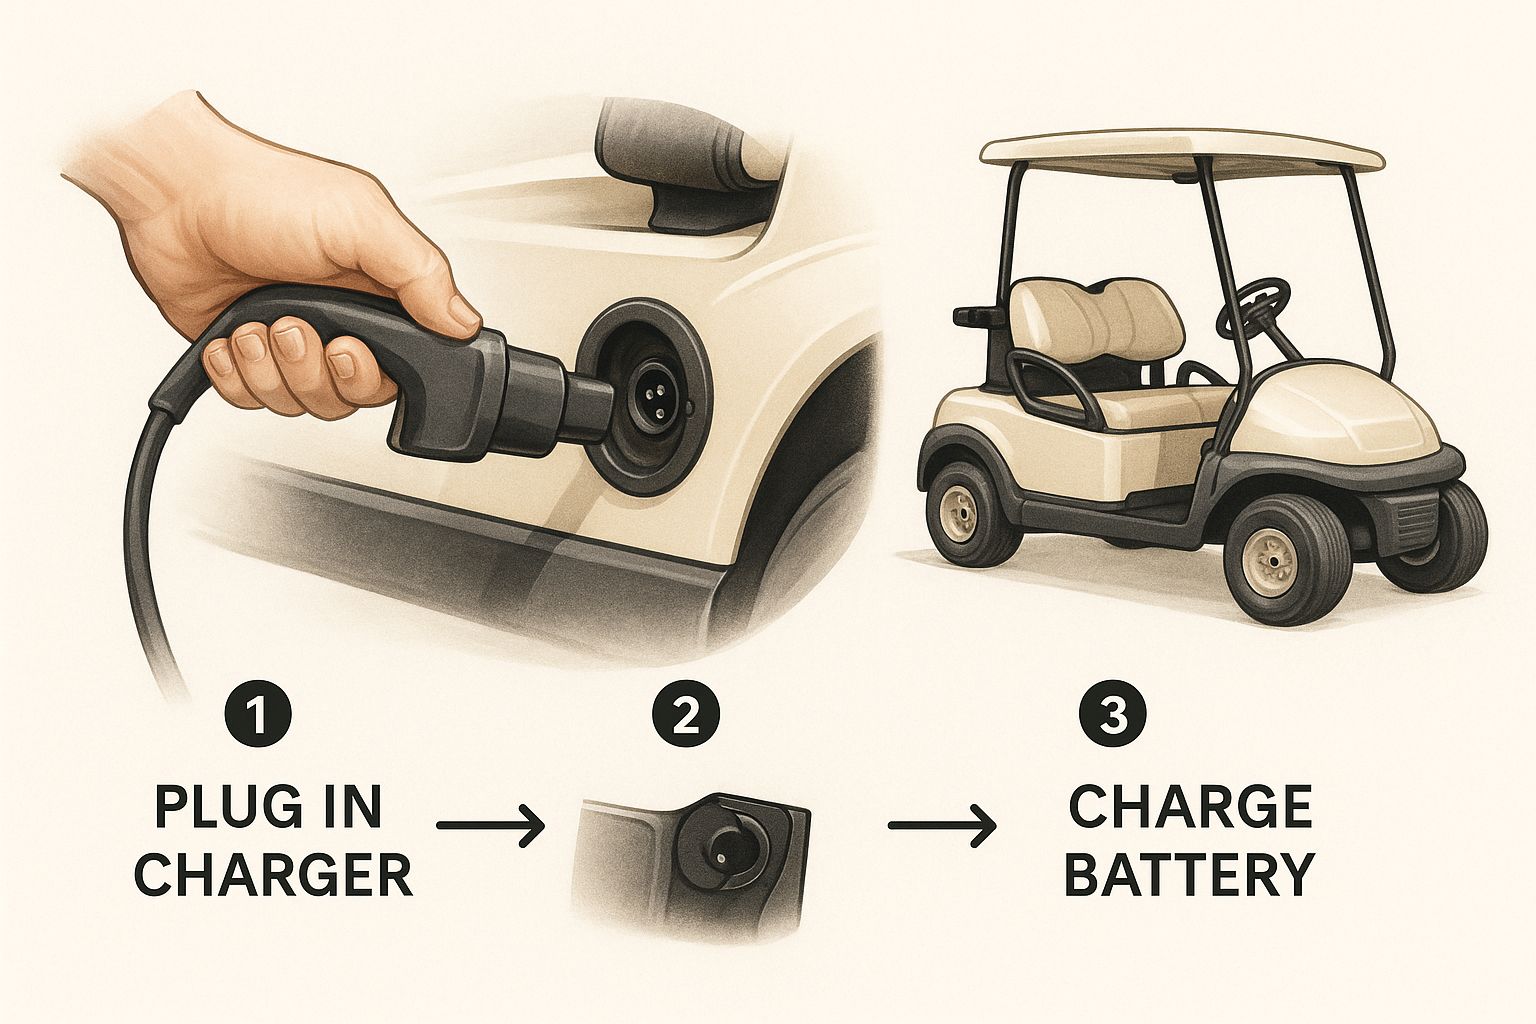
Following this order is key to preventing sparks and ensuring you have a solid connection before the power starts flowing.
Pre-Charge Safety Checks
Before you plug anything in, just take thirty seconds for a quick look-around. This little habit can save you from some major headaches.
First, give your charging cables and the cart's receptacle a once-over. See any fraying, cracks, or exposed wires? What about the metal contacts on the plug—are they clean or covered in gunk and corrosion? A bad connection creates resistance, which means heat, and that's just wasted energy and a potential hazard.
Next, think about where you're charging. The space needs to have good airflow, especially if you're working with traditional lead-acid batteries. As they charge, they vent hydrogen gas, which you definitely don't want building up in a cluttered garage. It’s flammable.
It never hurts to brush up on general electrical safety tips either. A little bit of caution goes a long, long way.
The Correct Connection Sequence
The order you plug things in is a bigger deal than most people think. Getting it right minimizes the chance of a spark right at the charging port, which can slowly but surely damage the sensitive electronics.
- Charger to Cart First: Always connect the charger’s DC cord to the golf cart's port first. Make sure it clicks in and feels snug. A wobbly, loose connection is a classic culprit for overheating and charging failures.
- Charger to Wall Outlet Last: Only after the cart is connected should you plug the AC power cord into a grounded wall outlet.
This "cart-then-wall" method is the gold standard. It ensures the circuit is safely completed before you introduce any electricity into the system.
A common mistake I see is people plugging the charger into the wall first. This makes the cart-side plug "live" while you're fumbling to connect it, which is exactly what causes that little spark that can wear out the contacts over time.
Monitoring the Charge
Once it's all hooked up, the charger should spring to life. Most modern smart chargers have indicator lights or even a small screen to show you what’s going on. Don’t just plug it in and walk away—hang around for a minute to make sure the charge has actually started.
You should see a light start blinking or change color, signaling the main charging phase has begun. It’s perfectly normal for the charger unit to get warm and for its fan to start humming. What's not normal is it being too hot to comfortably touch. Excessive heat is a big red flag.
By the way, the efficiency of this process—how much of that power from the wall actually ends up in your batteries—is a fascinating topic. We did a deep dive on https://solanaev.com/ev-charging-efficiency/, and a lot of the same principles apply here.
Disconnecting After a Full Charge
Your smart charger will handle the final stage on its own. When the batteries are full, it will switch over to a "float" or maintenance mode, which is usually indicated by a solid green light. This just keeps them topped off without overcharging.
When you're ready to hit the course, just disconnect in the reverse order.
- Unplug from the wall outlet first. This kills the power flowing to the charger.
- Then, unplug the charger from the golf cart.
After you disconnect, take one last look around. For lead-acid batteries, check for any signs of fluid leakage or anything else that seems off. Making this whole process a habit is the best way to keep your golf cart batteries healthy for the long haul.
Pro Tips for Better Battery Performance
If you want to move beyond the basic plug-and-charge routine, you can seriously extend the life and improve the performance of your batteries. A few key habits can turn charging your golf cart from a chore into a strategic part of your maintenance. This is how you squeeze every bit of power out of your investment and keep your cart running strong for years.

I get asked all the time about "opportunity charging"—plugging the cart in for a quick boost during a lunch break at the clubhouse. If you've got lithium batteries, go for it. Their chemistry is built for it, and topping them off whenever you get a chance is a great practice.
For traditional lead-acid batteries, however, the story is a bit different. While a quick top-up is definitely better than letting them sit nearly dead, these batteries really thrive on full, uninterrupted charging cycles. Constantly giving them short bursts of power can eventually lead to an imbalance in the battery cells, so the best practice is always to let them finish a complete cycle after you use the cart.
The Critical Break-In Charge for New Batteries
When you get a brand-new set of lead-acid batteries, their first few charges are the most important of their entire life. This "break-in" period properly activates the lead plates inside, setting the stage for maximum capacity and longevity down the road. If you rush this process, you can permanently hamstring your battery's potential from day one.
Here’s how to do it right:
- First, a Full Charge: Before you even think about driving the cart, give those new batteries a complete, uninterrupted charge until the charger shuts off on its own.
- Easy Does It: For the first 5-10 cycles, stick to short, gentle trips. You want to avoid deep discharges, so try not to drain them more than 25-30%.
- Charge After Every Use: After each of those light trips, get the cart back on the charger immediately and let it run a full cycle.
Following this simple routine ensures the battery plates are properly conditioned to deliver their full power and accept a full charge for years to come.
Why You Need to Equalize Your Lead-Acid Pack
Over time, it's common for the individual cells in a lead-acid battery pack to drift out of sync. Some cells might hold a slightly higher charge than others, which slowly eats away at your cart's overall performance and range. This is where an equalization charge saves the day.
Equalization is basically a controlled, intentional overcharge. The goal is to bring all the cells up to the same optimal state of charge by dissolving the stubborn sulfate crystals that build up on the lead plates, a process that helps restore lost capacity.
Think of it as a deep-cleaning cycle for your batteries. It’s a crucial maintenance step for any lead-acid pack, but it's not something you do every time you charge. Most modern smart chargers have an equalization mode, and you should typically run it every 30-60 days or after roughly 10-15 normal charge cycles. For a deeper dive on this and other topics, our complete golf cart battery maintenance guide has you covered.
The Lithium Advantage: The Battery Management System
If you've made the jump to lithium batteries, a lot of this complexity is handled for you. Lithium packs come with a sophisticated onboard computer called a Battery Management System (BMS). This thing is a silent guardian, constantly working behind the scenes to protect your investment.
The BMS is responsible for:
- Cell Balancing: It actively makes sure every individual cell inside the pack holds an equal state of charge. No drifting, no imbalances.
- Overcharge Protection: It knows exactly when the battery is full and cuts off the charging current to prevent damage.
- Over-Discharge Protection: It also protects the battery from being drained too low, which can cause permanent harm to the cells.
This built-in intelligence is a huge part of why lithium batteries offer such a long, practically maintenance-free lifespan. The BMS does the heavy lifting, so you can just plug in and go.
Linking Battery Care to Charging Success
You can have the best charging routine in the world, but it won't mean a thing if your batteries aren't healthy enough to accept and hold that power. Think of your battery pack like the tires on your car. If they're old, cracked, and leaking air, it doesn't matter how fancy your air compressor is—you’re not getting very far. The same logic applies here.
Simple, consistent maintenance is the bridge between the energy your charger provides and the performance you get out on the course. With the global golf cart battery market steadily growing as more courses and owners switch to electric, understanding this connection is more important than ever. Proper care isn't just about performance; it's about protecting your investment. For a deeper dive into these market trends, you can explore the analysis on Future Market Insights.
Keeping Your Connections Clean
One of the most frequent culprits behind charging problems is also one of the easiest to spot: corrosion. That crusty, white, or greenish buildup on your battery terminals is a major energy thief. It acts like an insulator, creating resistance that chokes the flow of electricity from your charger to the battery. This makes the charger work overtime, generates a lot of excess heat, and ultimately means less power actually makes it inside.
A little preventative cleaning goes a long way. Here’s how I handle it:
- Safety First: Always disconnect the main positive and negative cables from the battery pack. You don't want any surprises.
- The Go-To Solution: Mix up a simple paste with baking soda and a bit of water. It's cheap and incredibly effective.
- Scrub It Down: Use an old toothbrush or a proper terminal cleaning brush to apply the paste. You'll see it bubble and fizz as it neutralizes the acidic corrosion.
- Rinse with Care: Gently rinse the terminals with a small amount of clean water. The key is to avoid letting any of that corrosive gunk wash down into the battery cells.
- Protect and Prevent: After everything is completely dry, a quick spray of terminal protector or a thin coat of petroleum jelly will help stop new corrosion from forming.
Neglecting corroded terminals is like trying to drink a thick milkshake through a tiny, clogged straw. The energy is there, but it struggles to get through, leading to inefficient charging and potential damage over time.
The Importance of Proper Watering
If you're running traditional flooded lead-acid (FLA) batteries, checking the water levels is a non-negotiable monthly task. It's just part of the deal. As the batteries charge, some of the water in the electrolyte solution turns into hydrogen and oxygen gas and escapes. Over time, the water level drops. If it gets low enough to expose the lead plates, they can be permanently damaged, effectively killing that cell's ability to hold a charge.
Topping them off is simple, but the timing and technique are critical.
Your Quick Guide to Watering Lead-Acid Batteries
- Charge First, Water Second: Always, and I mean always, check and add water after the batteries are fully charged. The electrolyte level naturally rises during charging, so filling them beforehand is a surefire way to cause an acidic overflow.
- Only Use Distilled Water: Tap water is loaded with minerals that will build up on the lead plates and destroy your batteries. Don't risk it. A gallon of distilled water is cheap insurance.
- Fill to the Right Level: Pop the caps off and look inside. The goal is to fill the water just enough to cover the top of the lead plates or to reach the bottom of the vent well (that little plastic ring inside). Don't overfill!
This one simple habit directly impacts your battery's lifespan and its ability to take a full charge. A well-watered battery is a happy battery.
Seasonal Battery Maintenance Checklist
Proper battery care isn't a one-and-done task; it changes with the seasons. Keeping up with a simple checklist can make a huge difference in how your batteries perform year-round and how long they last.
| Task | Frequency (In-Season) | Off-Season Storage Prep | Notes & Tips |
|---|---|---|---|
| Visual Inspection | Weekly | Once, before storage | Look for cracks in the casing, loose cables, and signs of leaks. |
| Clean Terminals | Monthly | Yes | Use a baking soda paste. A clean connection is a good connection. |
| Check Water Levels | Every 2-4 weeks | Yes, after final charge | For lead-acid only. Always use distilled water. Never tap water. |
| Full Charge Cycle | After every use | Yes, a full "storage" charge | Avoid leaving batteries partially discharged for long periods. |
| Tire Pressure Check | Monthly | Once, before storage | Under-inflated tires make the motor work harder, draining batteries faster. |
| Equalization Charge | As recommended | Not typically needed | For lead-acid only. Follow your battery manufacturer's guidelines. |
Following a schedule like this turns maintenance from a chore into a routine, ensuring your cart is always ready to go when you are.
Preparing for the Off-Season
When it's time to put the cart away for the winter, your charging strategy needs to shift from daily use to long-term preservation. Just letting the batteries sit for months is a recipe for a dead pack come springtime.
For lead-acid batteries, the big enemy is sulfation. This is when sulfate crystals form and harden on the lead plates, which can permanently cripple their capacity. To stop this, give the pack one last full charge and then hook it up to a quality battery maintainer. These smart devices provide a low, steady trickle charge that keeps the batteries topped off without overcharging, preventing sulfation from taking hold.
Lithium batteries, on the other hand, are much lower maintenance. Just charge them to around 50-70%—not full—and store the cart in a cool, dry place. Their chemistry allows them to hold a charge for months with a very low self-discharge rate, so there's no need for a tender.
Answering Your Top Golf Cart Charging Questions
When it comes to charging your golf cart, a few questions pop up time and time again. Getting these right isn't just about convenience; it's about protecting your batteries, which are the most expensive part of your cart. Let's clear up some of the most common uncertainties I hear from owners.
Can I Just Leave My Golf Cart Plugged In?
This is probably the number one question I get, and the answer really depends on your charger. If you have a modern "smart" charger, then yes, you can generally leave it plugged in. These chargers are brilliant—they fill the batteries up and then automatically dial back to a maintenance or "float" mode. This little trickle of power keeps them topped off without cooking them.
Now, if you're working with an older, manual-style charger, it's a completely different story. You absolutely have to unplug it once the batteries are full. Leaving one of those connected will just keep cramming power into the batteries, which can boil the electrolyte fluid right out of a lead-acid pack and cause permanent damage.
Even with a smart charger, I usually tell people it's a good habit to unplug it a day or so after it's finished. It just eliminates any small risk from a power surge or a potential charger malfunction.
How Often Should I Be Charging My Cart?
For classic lead-acid batteries, the rule is simple: charge after every single use. I don't care if you just drove it down to the mailbox and back. Plug it in. This habit is your best defense against sulfation, a nasty process where crystals build up on the battery plates and choke the life out of them.
Lithium batteries are much more laid-back about this and don't really suffer from sulfation. Still, giving them a regular charge is a good way to keep everything in peak condition.
Here’s a piece of advice that applies to any battery type: try your best to never let the battery pack dip below a 50% charge. Constantly running it down to empty puts a ton of stress on the batteries and will absolutely shorten their lifespan.
Why Is My Golf Cart Charger Getting So Hot?
A bit of warmth is totally normal. Your charger is doing a lot of work converting the AC power from your wall outlet into the DC power your batteries need. But if it gets so hot you can't comfortably rest your hand on it, that's a warning sign.
A few things could be causing it to overheat:
- No Room to Breathe: Is the charger crammed into a tight space or covered with a rag? It needs airflow to cool down. Give it some open space.
- Bad Connections: Check where the charger plugs into the cart and the wall. Any dirt, grime, or a loose fit will create electrical resistance, and resistance generates heat.
- The Batteries are the Problem: Sometimes, if the batteries themselves are failing, they struggle to take a charge. This forces the charger to run harder and longer than it's designed to, causing it to get dangerously hot.
Always make sure your charger has plenty of ventilation and that all the connections are clean and snug.
Is It Okay to Use an Extension Cord?
Look, plugging the charger directly into a proper wall outlet is always your best bet. But sometimes, you just can't. If you absolutely have to use an extension cord, you need to use the right one.
Don't even think about grabbing that skinny orange cord you use for the holiday lights. You need a short, heavy-duty cord—I always recommend a 12-gauge at a minimum. A long, undersized cord creates a voltage drop, which essentially starves the charger for power. This not only makes charging painfully slow but can also overheat both the cord and the charger, risking damage to your cart’s electronics.
And one critical safety tip: never, ever use an extension cord while it's still coiled up. That's a textbook fire hazard.
Ready to upgrade your ride to a vehicle that combines effortless performance with modern technology? Explore the full lineup of premium, street-legal electric vehicles at Solana EV and discover the future of personal transportation. Find your perfect match at https://solanaev.com.